How to Send Sales Cold Emails in Bulk
Sending cold emails one by one by hand—this can't go on.
Last time, we walked you through the first step of how Dalpha's BD/Sales team operates.
"Let's use a bit of simple code to automatically write tailored messaging and craft compelling cold emails for potential clients!"
is probably how we could sum up our last post in a single sentence.
Once you've finished composing your email content with tailored messaging, it's time to send those emails out to potential clients, right?
Most B2B companies set up personas and send cold emails all at once to anywhere from a few dozen to a few hundred—or even a few thousand—potential clients.
If you only have a small number of recipients, you can send the emails one by one or use Gmail's bcc feature. However, when there are many recipients, adopting these methods takes far too much time and is practically impossible.
At Dalpha, too, in our early startup days we searched out companies likely to use a particular AI one by one and sent each of them a cold email individually. But now that we're in contact with many potential clients, we started looking for a way to send cold emails efficiently.
There are various solutions out there like Stibee and SendGrid, but we discovered that you can send cold emails in bulk using nothing but the features Google provides.
In this post, how you can send emails in bulk using code in Google Apps Script is what we'll explain.
So, how exactly do you auto-send in bulk?
Because Google Apps Script is hard-coded, the code each person sets up will be different, so please treat the code I'm sharing today as a simple reference. What I'm describing is by no means the one right answer :)
Create a Google Spreadsheet → Write code in Apps Script → Test → Send emails
You can send cold emails in just these 4 steps.
With that, let's walk through the auto-send process using cold emails for selling Dalpha's review analysis AI as an example.
1. Create a Google Spreadsheet and fill in the fields
After creating a Google Spreadsheet, fill in the fields needed to send emails.
The fields needed to send emails will vary greatly depending on the situation, but at Dalpha we entered just 3: company name, email address, and custom message.
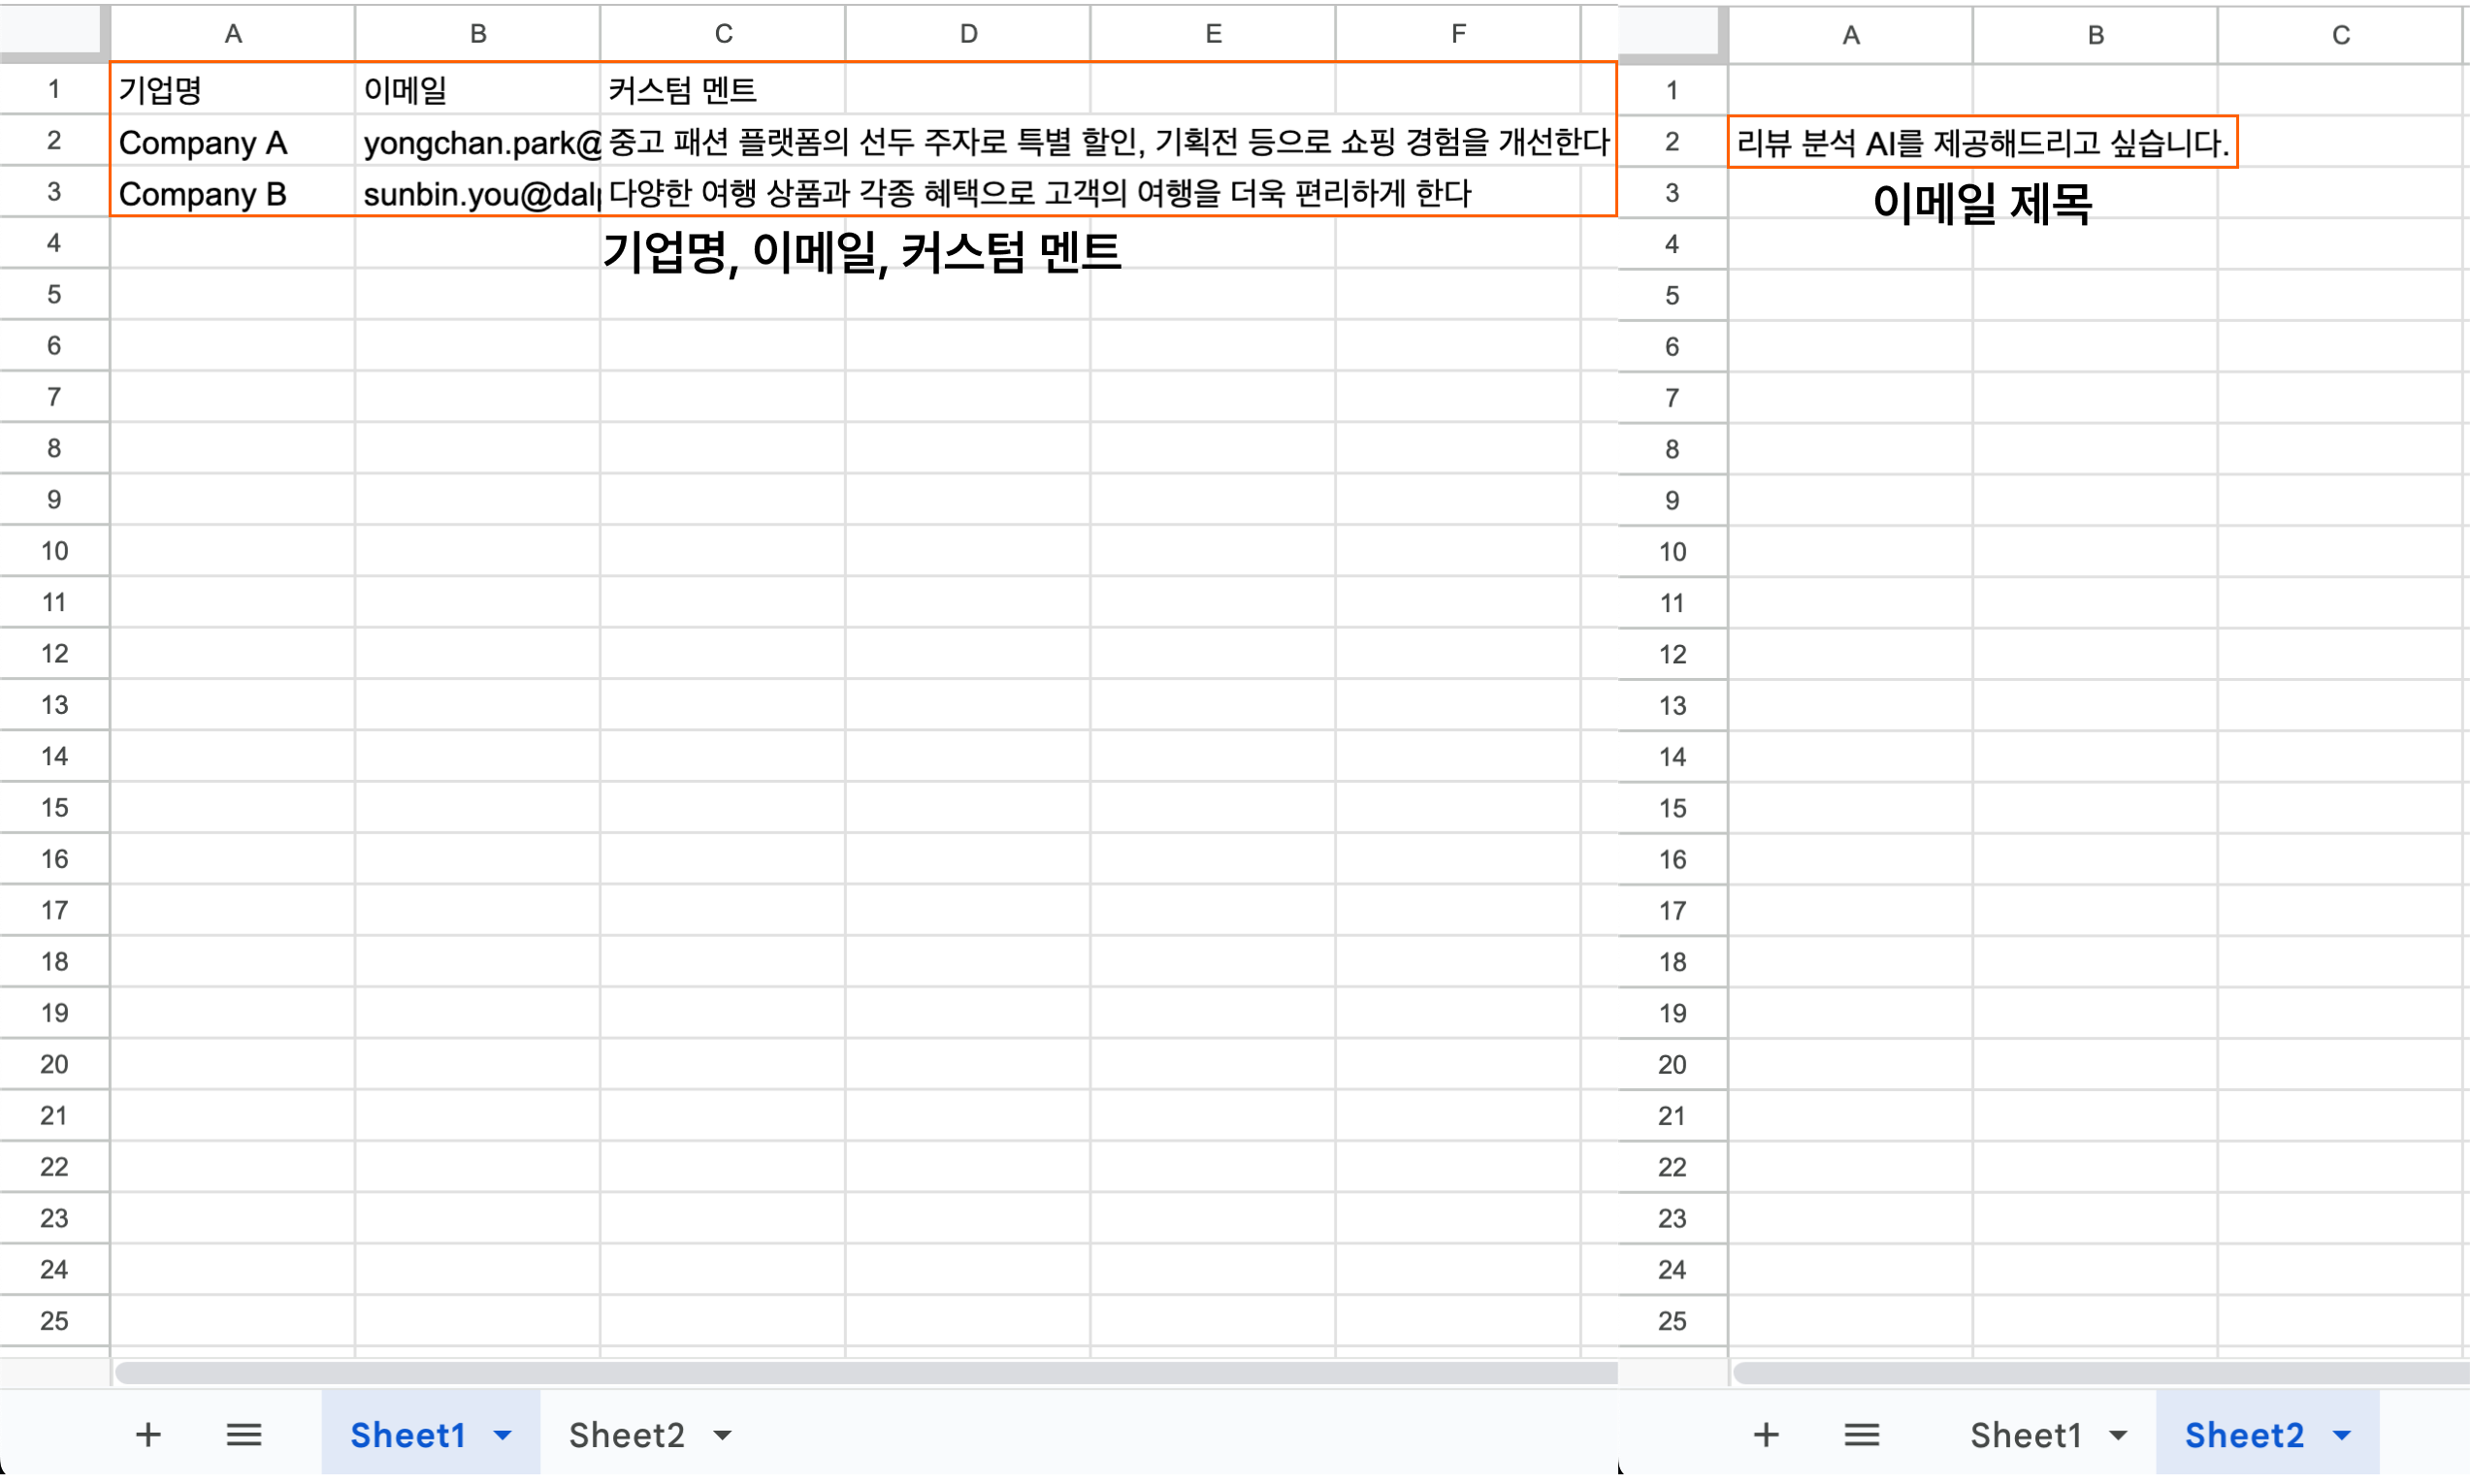
In Sheet 1, enter the company name in column A, the email address in column B, and the custom message in column C.
In Sheet 2, enter the email subject in column A.
2. Apps Script coding
Once you've filled in all the fields, go to 'Extensions → Apps Script' in the top bar and create a code file.
After that, we used ChatGPT to do the hard-coding.
function sendEmail() {
    //변수 설정
    const ss = SpreadsheetApp.getActiveSpreadsheet()
    const sheet1 = ss.getSheetByName('sheet1'); // 이메일 보낼 사람들과 커스텀 멘트가 들어간 시트명
    const sheet2 = ss.getSheetByName('sheet2'); // 이메일 제목이 들어간 시트명
    const subject = sheet2.getRange(2,1).getValue(); // 이메일 제목 추출
    const n = sheet1.getLastRow(); // 이메일 보낼 명단이 전체 몇 명인지 확인
    const senderName = "Dalpha 박용찬";

    // 행 반복 구문
    for (let i = 2; i < n + 1; i++) {
      const companyName = sheet1.getRange(i, 1).getValue();
      const emailAddress = sheet1.getRange(i, 2).getValue();
      const customment = sheet1.getRange(i,3).getValue();
      // 이메일 내용 작성
      const body = `
      <pre style="font-size: 12px; color: black; font-family: Arial, sans-serif;">안녕하세요,
Dalpha 박용찬입니다.

${companyName}께서 ${customment}고 들었습니다.

<strong>리뷰를 자동으로 분석하는 AI</strong>를 도입해보시는 것은 어떠실까요?
관련해서 <strong>간단한 미팅</strong>을 진행해보면 좋을 것 같습니다.

내부적으로 논의 후 편하게 회신 주시면 감사하겠습니다.

감사합니다.
박용찬 드림
    </pre>
    <img src="<https://email-14.s3.ap-northeast-2.amazonaws.com/yongchan_card.png>" alt="Image Alt Text" style="display: block; max-width: 30%; margin: 20px 0 20px 0;">
    `;

    MailApp.sendEmail({
      to: emailAddress,
      subject: subject,
      htmlBody: body,
      name: senderName,
      });
    }
}
Explaining it with only the code like this might leave some parts unclear, so let's break down the adjustable parts in detail.
Line 2 'Variable setup'
Set each field you filled in on the sheet as a variable.
You do things like setting Sheet 1 as the sheet name containing the people you'll email and the custom messages, and setting cell A2 of Sheet 2 as the email subject.
Setting variables here is essential, because they're what get applied later when you write the code for things like the email content.
Line 10 'Row loop statement'
When there are multiple rows and you need to repeat all the way to the last row, use a for statement to set the variables.
Since you need to send the email to every potential client entered from row 2 to the last row, you write code that 'loops' through and sends to each email address.
Line 15 'Composing the email content'
Now you enter the code that actually composes the email content.
Here's what each piece of code means.
<pre style=___> : sets things like the font size, color, and type of the email content
<strong>___</strong> : sets the part you want to display in bold
${companyName} : inserts a different company name for each row
${customment} : inserts a different custom message for each row
img src : capture your business card, paste it in as an image URL, and you can also set the image's size
Once you've entered all the code, be sure to press Save projectto finish up your code work.
If you don't press Save, it won't send at all, so keep that in mind!
Also, if you press Save and an error occurs, you need to check which line of code is wrong.
3. Send test
Before you actually start sending emails, you need to do a send test to confirm the emails go out properly according to the code you've set up.
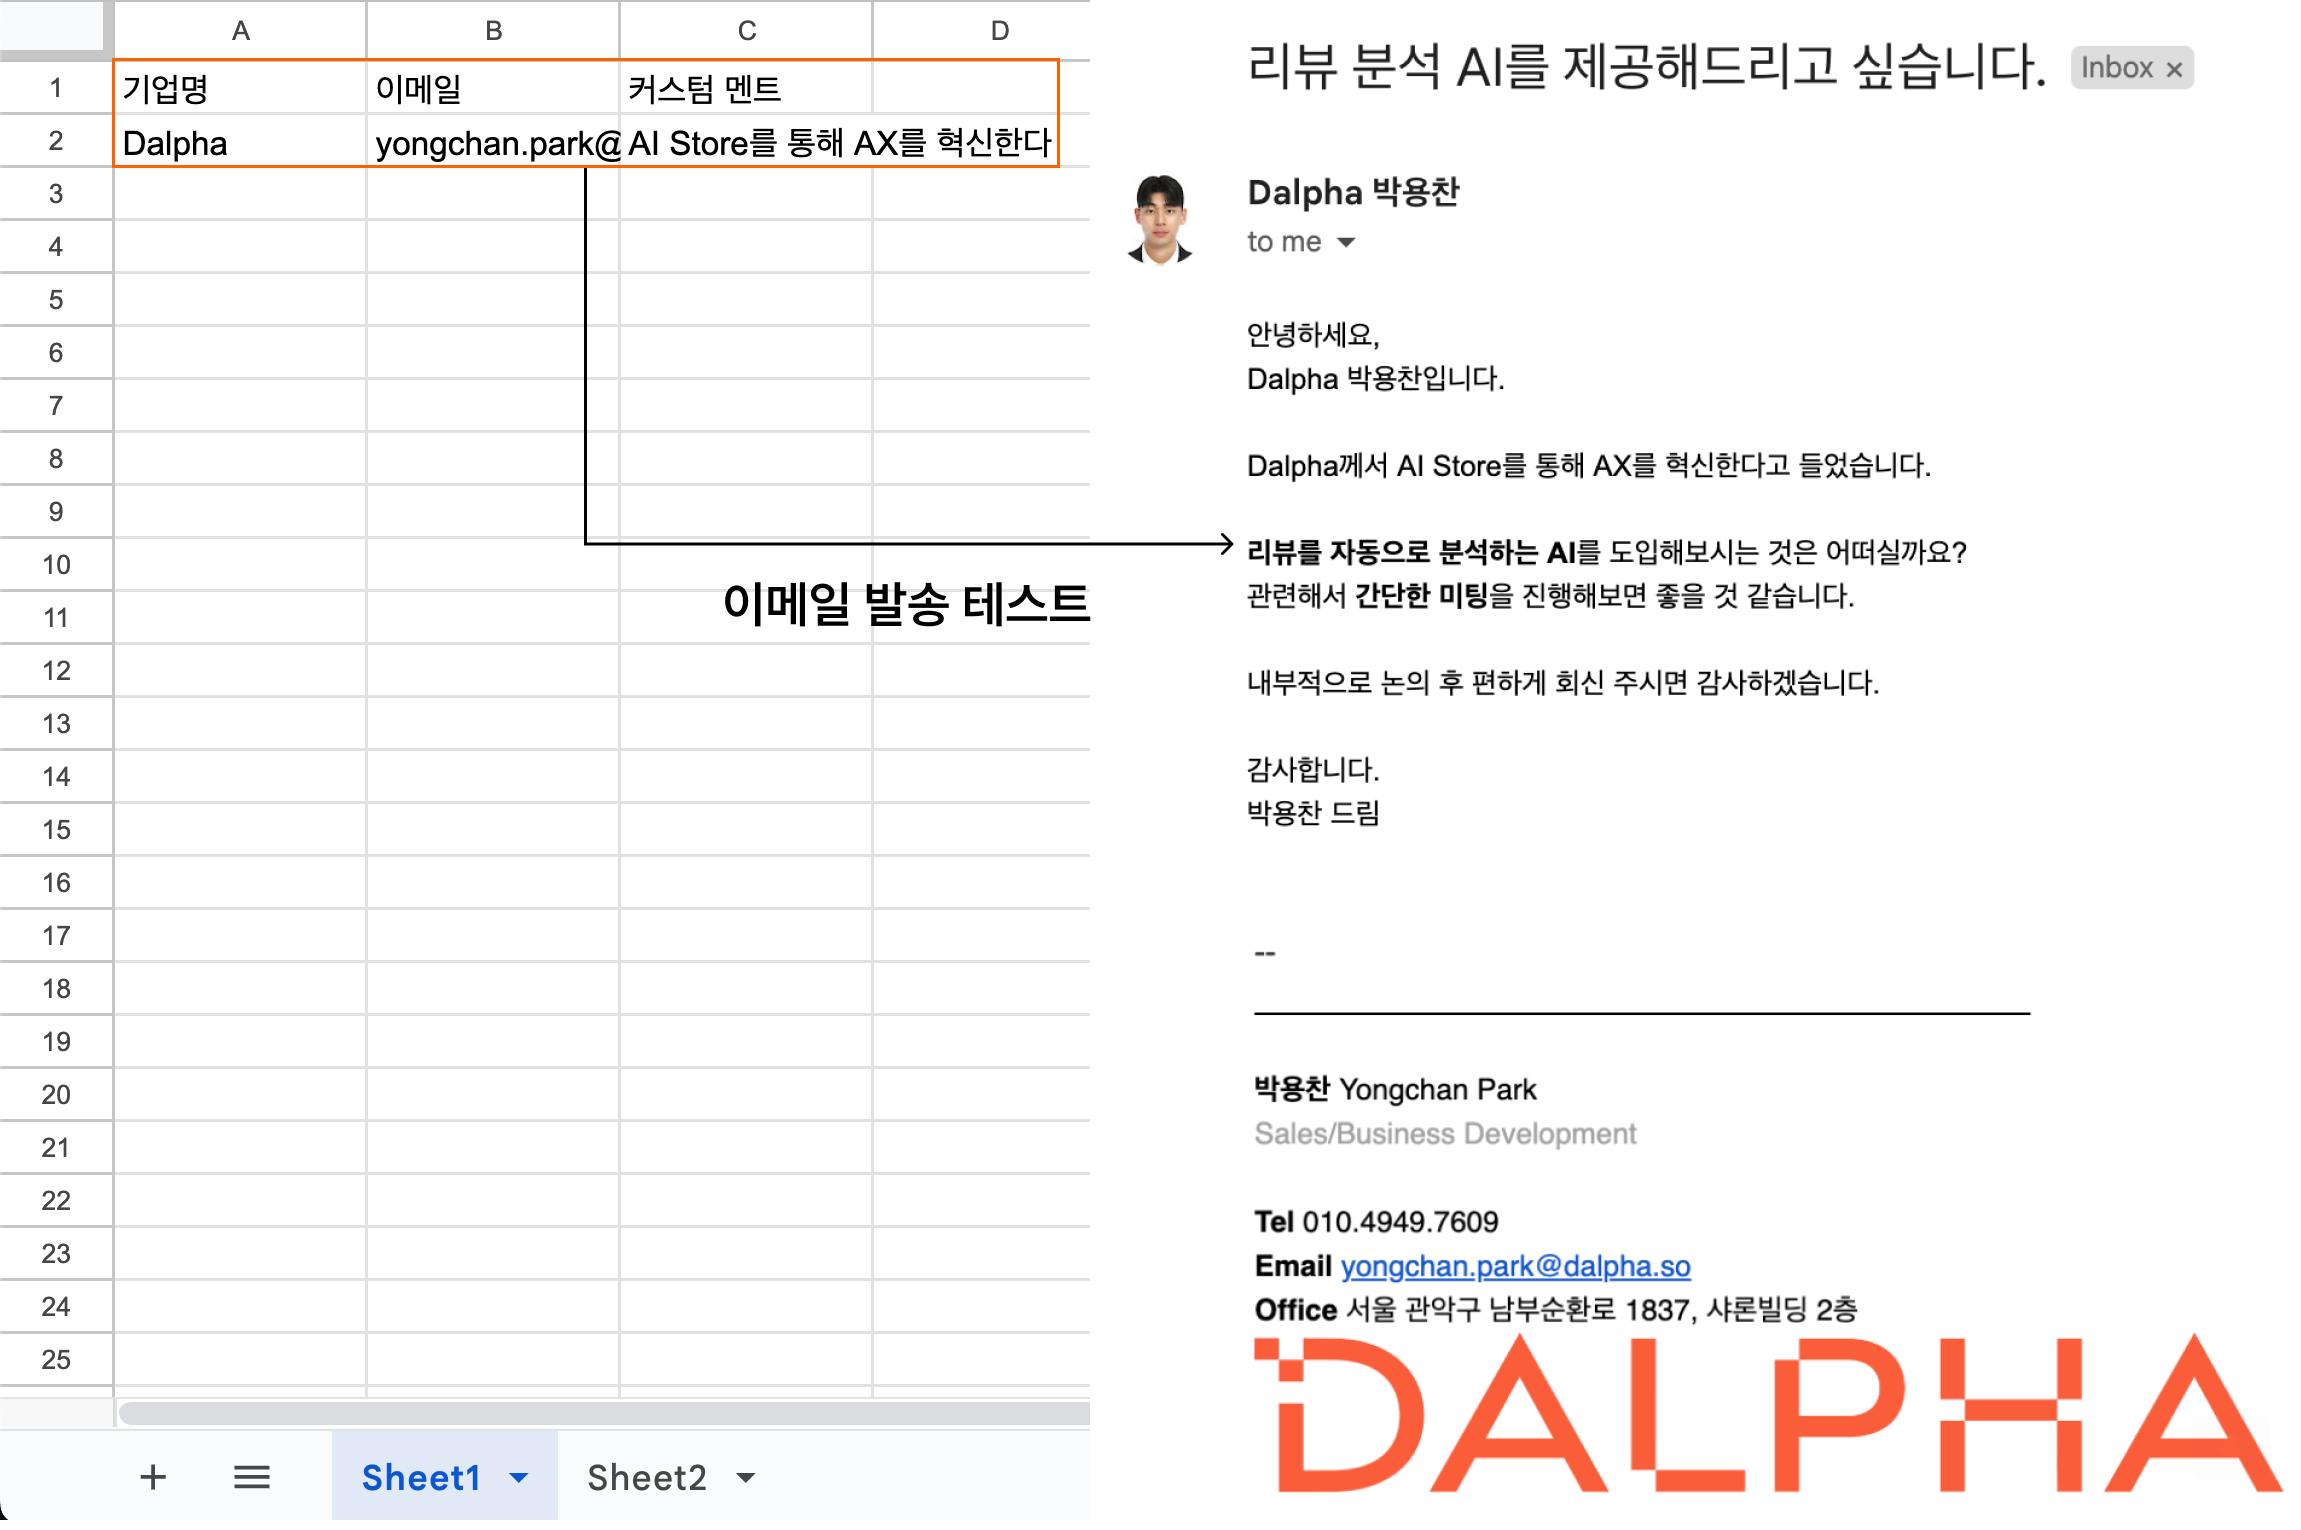
Fill in your own company name, email address, and custom message in Sheet 1, and test it beforehand by sending the email to yourself.
You can confirm that the email goes out properly as intended.
If there's an error or typo in the code and you send right away without running a send test, you could make an irreversible mistake with a potential client—so we strongly recommend you "definitely" run a send test.
4. Send the emails
Now that you've confirmed the email sends properly, remove your own info from Sheet 1, fill in all the recipient info, and send the emails.
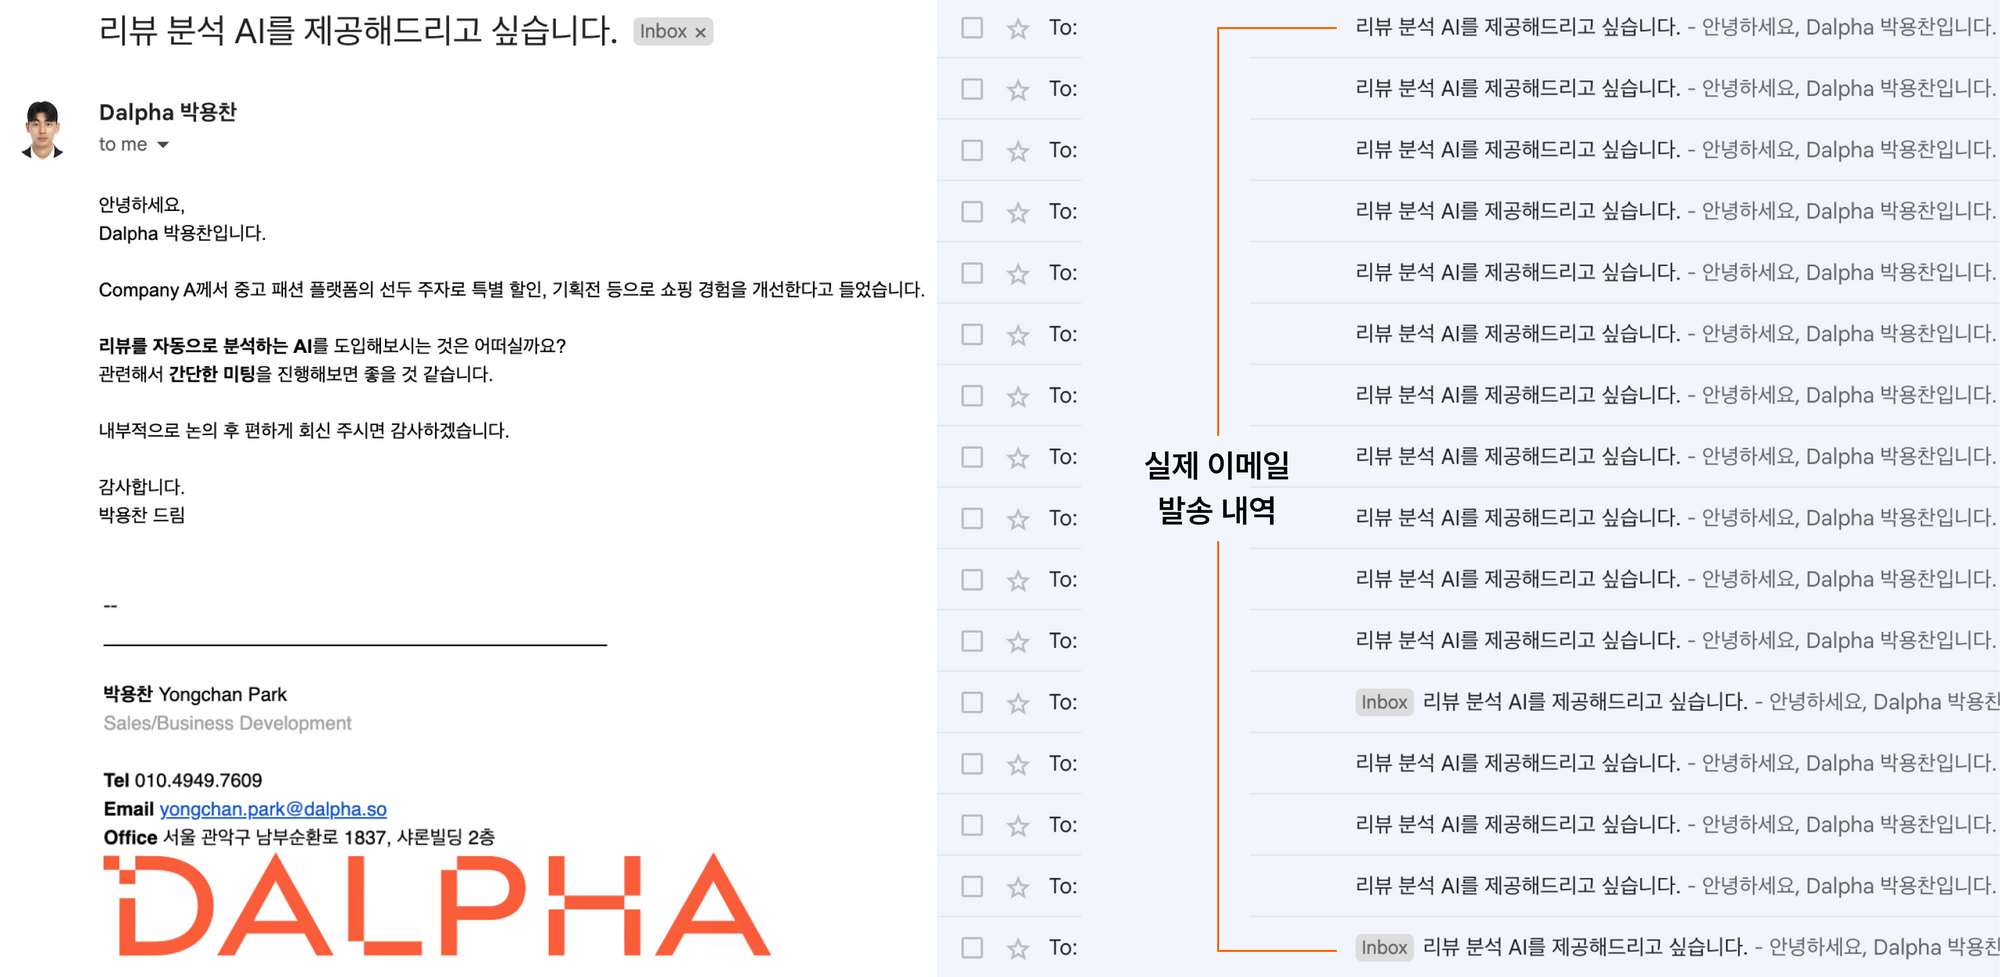
This is an example of an email Dalpha sent.
In fact, Dalpha recently used this very method to send cold emails offering our "STT summarization AI."
After gathering the recipient info, we sent the email to about 150 companies in just 15 minutesand were able to efficiently cut down on time.
Out of all the companies we contacted, about 10% repliedand we were able to hold business meetings with all of them.
Let's become a BD/Sales team that operates efficiently!
Lately, the Dalpha BD/Sales team has been thinking deeply about how to work more efficiently and effectively in order to scale up.
We're a company developing AI solutions to reduce companies' manual work—so it would be a glaring contradiction to keep doing our own internal work by hand, wouldn't it? :)
As our first step, we've been putting our energy into automation, and the email-sending automation we shared today is part of that effort.
Going forward, our team will keep tackling work automation from 0 to 1, and we'll happily share the know-how we pick up along the way.
We'll do our best to fully deliver the BD/Sales team's insights next time too :)

Yongchan Park